infra:lights
Table of Contents
Lighting @ Humla
General
Mate-light
About

The matelight has two sets of connection:
- The data lines are sequential - everything's connected in series (see data flow in pic above)
- The power lines are connected wherever, but it's easiest to keep them at the bottom
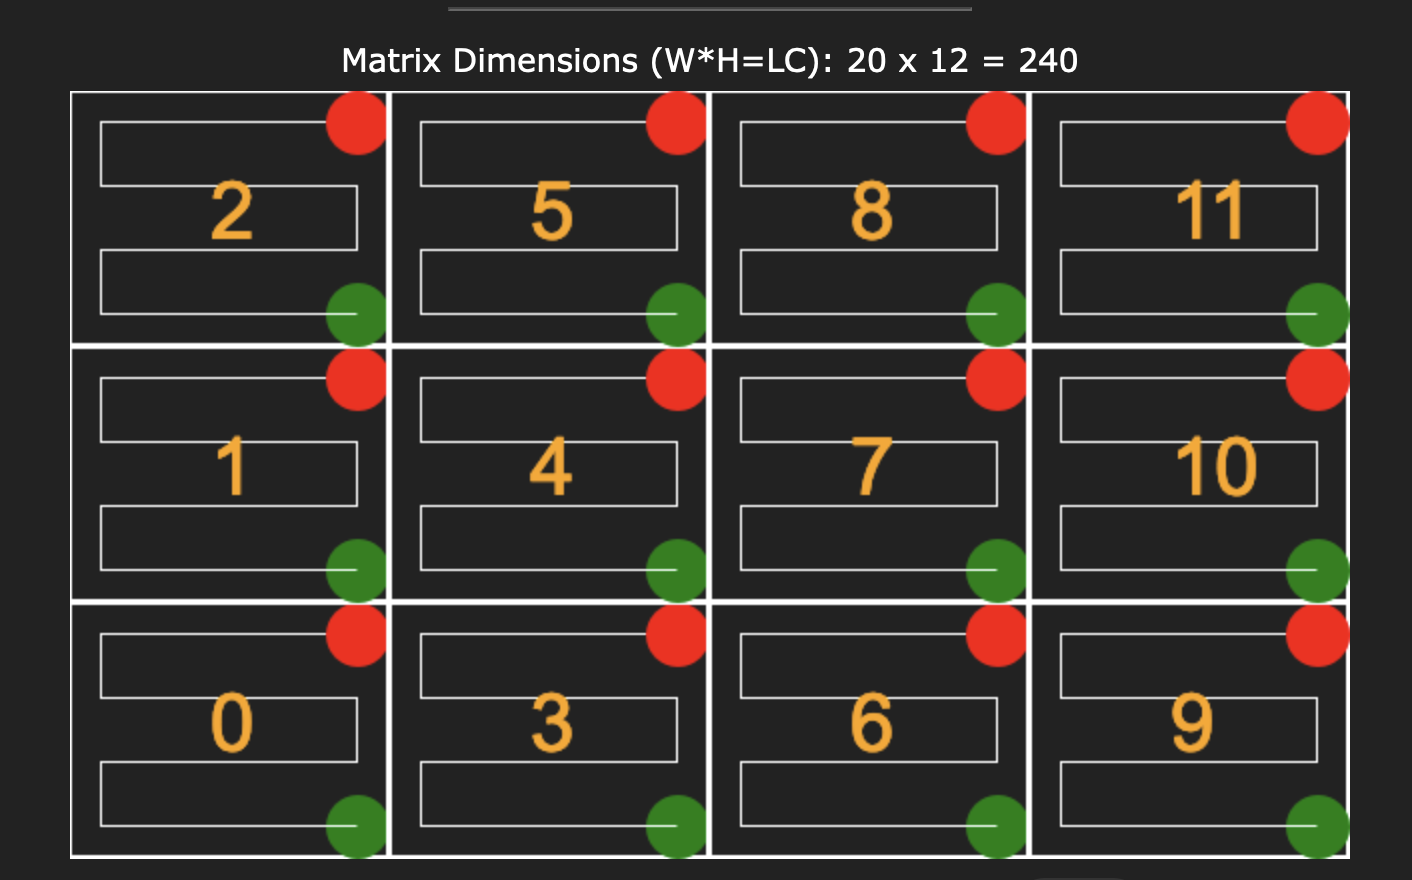
Each box has a sequential string of lights which runs in a serpentine pattern. When seen from behind, data in should be on the lower left, and data out at the upper left.
It's held together by two ratchet straps which are joined together with the ratchets on the same side.

Fig A: a Ratchet
Teardown

0. Disconnect the power
1. Disconnect the short data lines (pink circles)
2. Disconnect the long data lines and take the cables out (green)
3. Disconnect the micro controller and take it out (orange)
4. Release the WAGO clamps with the power. You can keep one end connected
4. Open the ratchet strap
5. Take table off and take boxes off
6. Stack as regular mate crates, bring extra snacks along on the side
Setup
1. Put ratchet strap out on the floor (the part without the ratchet). The hook should be on the right when you're looking at (what will become) the back of the device.
2. Put the crates on the strap, with the corner of the rightmost crate about 30 cm from the hook
    - Start and end of LED chain should be on the left side of the crates
    - The crates marked with green duct tape (middle of short sides) should be at the bottom (have been set up with power connectors)
    - The one crate with pink duct tape (middle of short sides) HAS to be at the top left (it doesn't have a connector for chaining and must be the last in the data chain)
3. Put table in place, edge to edge on the front
4. Connect the ratchet strap hooks (long strap to long strap) on the right
5. Connect the hooks of the ratchets on the left
6. Thread the straps through each ratchet, and pull through until 5 cm before they get tight
7. Fasten both ratchets so that the straps are fairly tight, and ratchets are aligned around the middle. Hide overflow strap somewhere so that nobody stumbles in them.
8. Connect data (reverse of teardown 1-3)
9. Connect power (reverse of teardown 4)
    - Connect the matelight data line to the output from the microcontroller which does _not_ have black tape on it (that's for a separate LED strip)
10. Connect to power and it should Just Work™
moar pix


Bitstreaming
Certain items, including WLED fixtures like Matelight, supports ingesting both raw and structured bitstreams. More information can be found on the WLED wiki.
Example: Stream a video file to the Matelight from FFMPEG, using the Hyperion integration in WLED:
ffmpeg -re -i badapple.webm -vf scale=20:12 -c:v rawvideo -pix_fmt rgb24 udp://10.10.3.24:19446/dummyname.rgb
DMX
| Start | Channels | Location | Fixture Type |
|---|---|---|---|
| 10 | 6 | Ceiling, towards audio rack | Fun Generation LED Pot 12x1W QCL RGB WW 40° |
| 20 | 6 | Shelf, towards project shelf | Fun Generation LED Pot 12x1W QCL RGB WW 40° |
| 30 | 6 | Ceiling, towards fridge/vending machine | Fun Generation LED Pot 12x1W QCL RGB WW 40° |
| 40 | 6 | Shelf, towards pinball-sofa | Fun Generation LED Pot 12x1W QCL RGB WW 40° |
| 50 | 6 | Ceiling, towards the stock of Mate boxes | Fun Generation LED Pot 12x1W QCL RGB WW 40° |
| 60 | 6 | Ceiling, towards laptop table | Fun Generation LED Pot 12x1W QCL RGB WW 40° |
Artnet
| Universe | Description |
|---|---|
| 0 | Reserved for ad-hoc temporary stuff |
| 1 | Reserved for ad-hoc temporary stuff |
| 5 | WLED, Effects |
| 6 | Reserved for PAR proxy |
| 20 | LedFX output |
Universe 5 - WLED effects
All items here are in Effect mode, with the first channel noted.
| Channel start | Node IP | Description |
|---|---|---|
| 1 | 10.10.3.24 | Matelight |
| 16 | 10.10.3.21 | Prusa Printer |
| 31 | 10.10.3.22 | Sprinkler |
| 46 | 10.10.3.25 | DMX PARs |
| 61 | 10.10.3.29 | Ceiling Video |
/srv/hackeriet-wiki/dokuwiki/data/pages/infra/lights.txt · Last modified: by d404d_idp.hackeriet.no